Archive | Recipes RSS feed for this section

Slow Cooker Cheesecake

22 Oct

pic18227

Cheesecake is one of my favourite desserts in the whole world. A cold, smooth and creamy cheesecake with a tasty graham cracker crust…top that with chocolate, caramel, fruit…I’ll take it all. I enjoy baking my own cheesecake but it takes a lot of time to make it. Prep time, an hour in the oven, cooling time, you get the picture. I could buy one but where’s the fun in that!

I’ve been using my slow cooker a lot more lately, it’s great to be able to just “set it and forget it” especially since I can hide the slow cooker away from my toddler son. One of my new favourite recipes is a Slow Cooker Cheesecake recipe from Ricardo Cuisine. I love to try recipes where I can make my favourites in a new way and this recipe was a perfect example of that. The recipe was very easy to put together, it cooked fairly quickly and the portion sizes were perfect – two cheesecakes each for me and my husband! (Three for me if he only eats one, yeah!). It’s a great recipe and I hope you’ll give it a try. I’m planning on making it again very soon. Enjoy!

Slow Cooker Cheesecake

I’ve included the original recipe below and I’ve added my own notes throughout. The link to the original recipe on the Ricardo site is given here (this recipe was shared with permission): http://www.ricardocuisine.com/recipes/5562-slow-cooker-cheesecake-2-

Ingredients – Cheesecake

Cheesecake

1 package 8 oz (250 g) cream cheese, softened

1/3 cup (75 ml) sugar (Note: Next time I’ll reduce the sugar a little, I found it a bit too sweet)

1 egg

1/4 cup (60 ml) 35% cream

1 teaspoon (5 ml) vanilla extract

Ingredients – Graham Crumble Topping

1/2 cup (125 ml) graham cracker crumbs

1/4 cup (60 ml) all­ purpose flour

2 tablespoons (30 ml) brown sugar

1/4 cup (60 ml) unsalted butter, softened

Ingredients – Strawberry Topping

1 cup (250 ml) diced strawberries

1 tablespoon (15 ml) sugar

Preparation:

Cheesecake

  1. Line the bottom of the slow cooker with a clean cloth (Note: I used a clean, folded dish cloth) to prevent the ramekins from vibrating.
  2. In a blender, purée all the ingredients until smooth. (Note: If you don’t have a blender handy, do what I did and use a hand mixer. Start off by beating the ingredients on low speed until combined and then switch to high speed to get a smooth texture). Divide the mixture among four 125 ml (1/2 cup) ramekins. Place the ramekins in the slow cooker (on top of the clean cloth) and pour hot water into the container halfway up the ramekins. (Note: I prepped a kettle of boiling water before I put the ingredients together. By the time everything was ready, the water was hot and at the right temperature).
  3. Cover and cook on low temperature for 1 hour and 15 minutes to 1 hour and 30 minutes or until they are firm and slightly puffy. Remove the ramekins from the slow cooker and let cool. Cover with plastic wrap. Refrigerate for at least 4 hours or until completely chilled.

Graham Crumble Topping

  1. With the rack in the middle position, preheat the oven to 180 °C (350 °F). Line a baking sheet with parchment paper.
  2. In a bowl, combine all the dry ingredients and add the butter. Combine until the mixture is crumbly. With your fingers, drop the dough into small pieces on the baking sheet. Bake for about 15 minutes or until golden brown, stirring twice during baking. Let cool. (Note: I loved the crumble but found the quantity was too much for just 4 ramekins. Next time I will make half the amount).

Strawberry Topping

  1. Combine the strawberries and sugar. Let rest for 5 minutes.
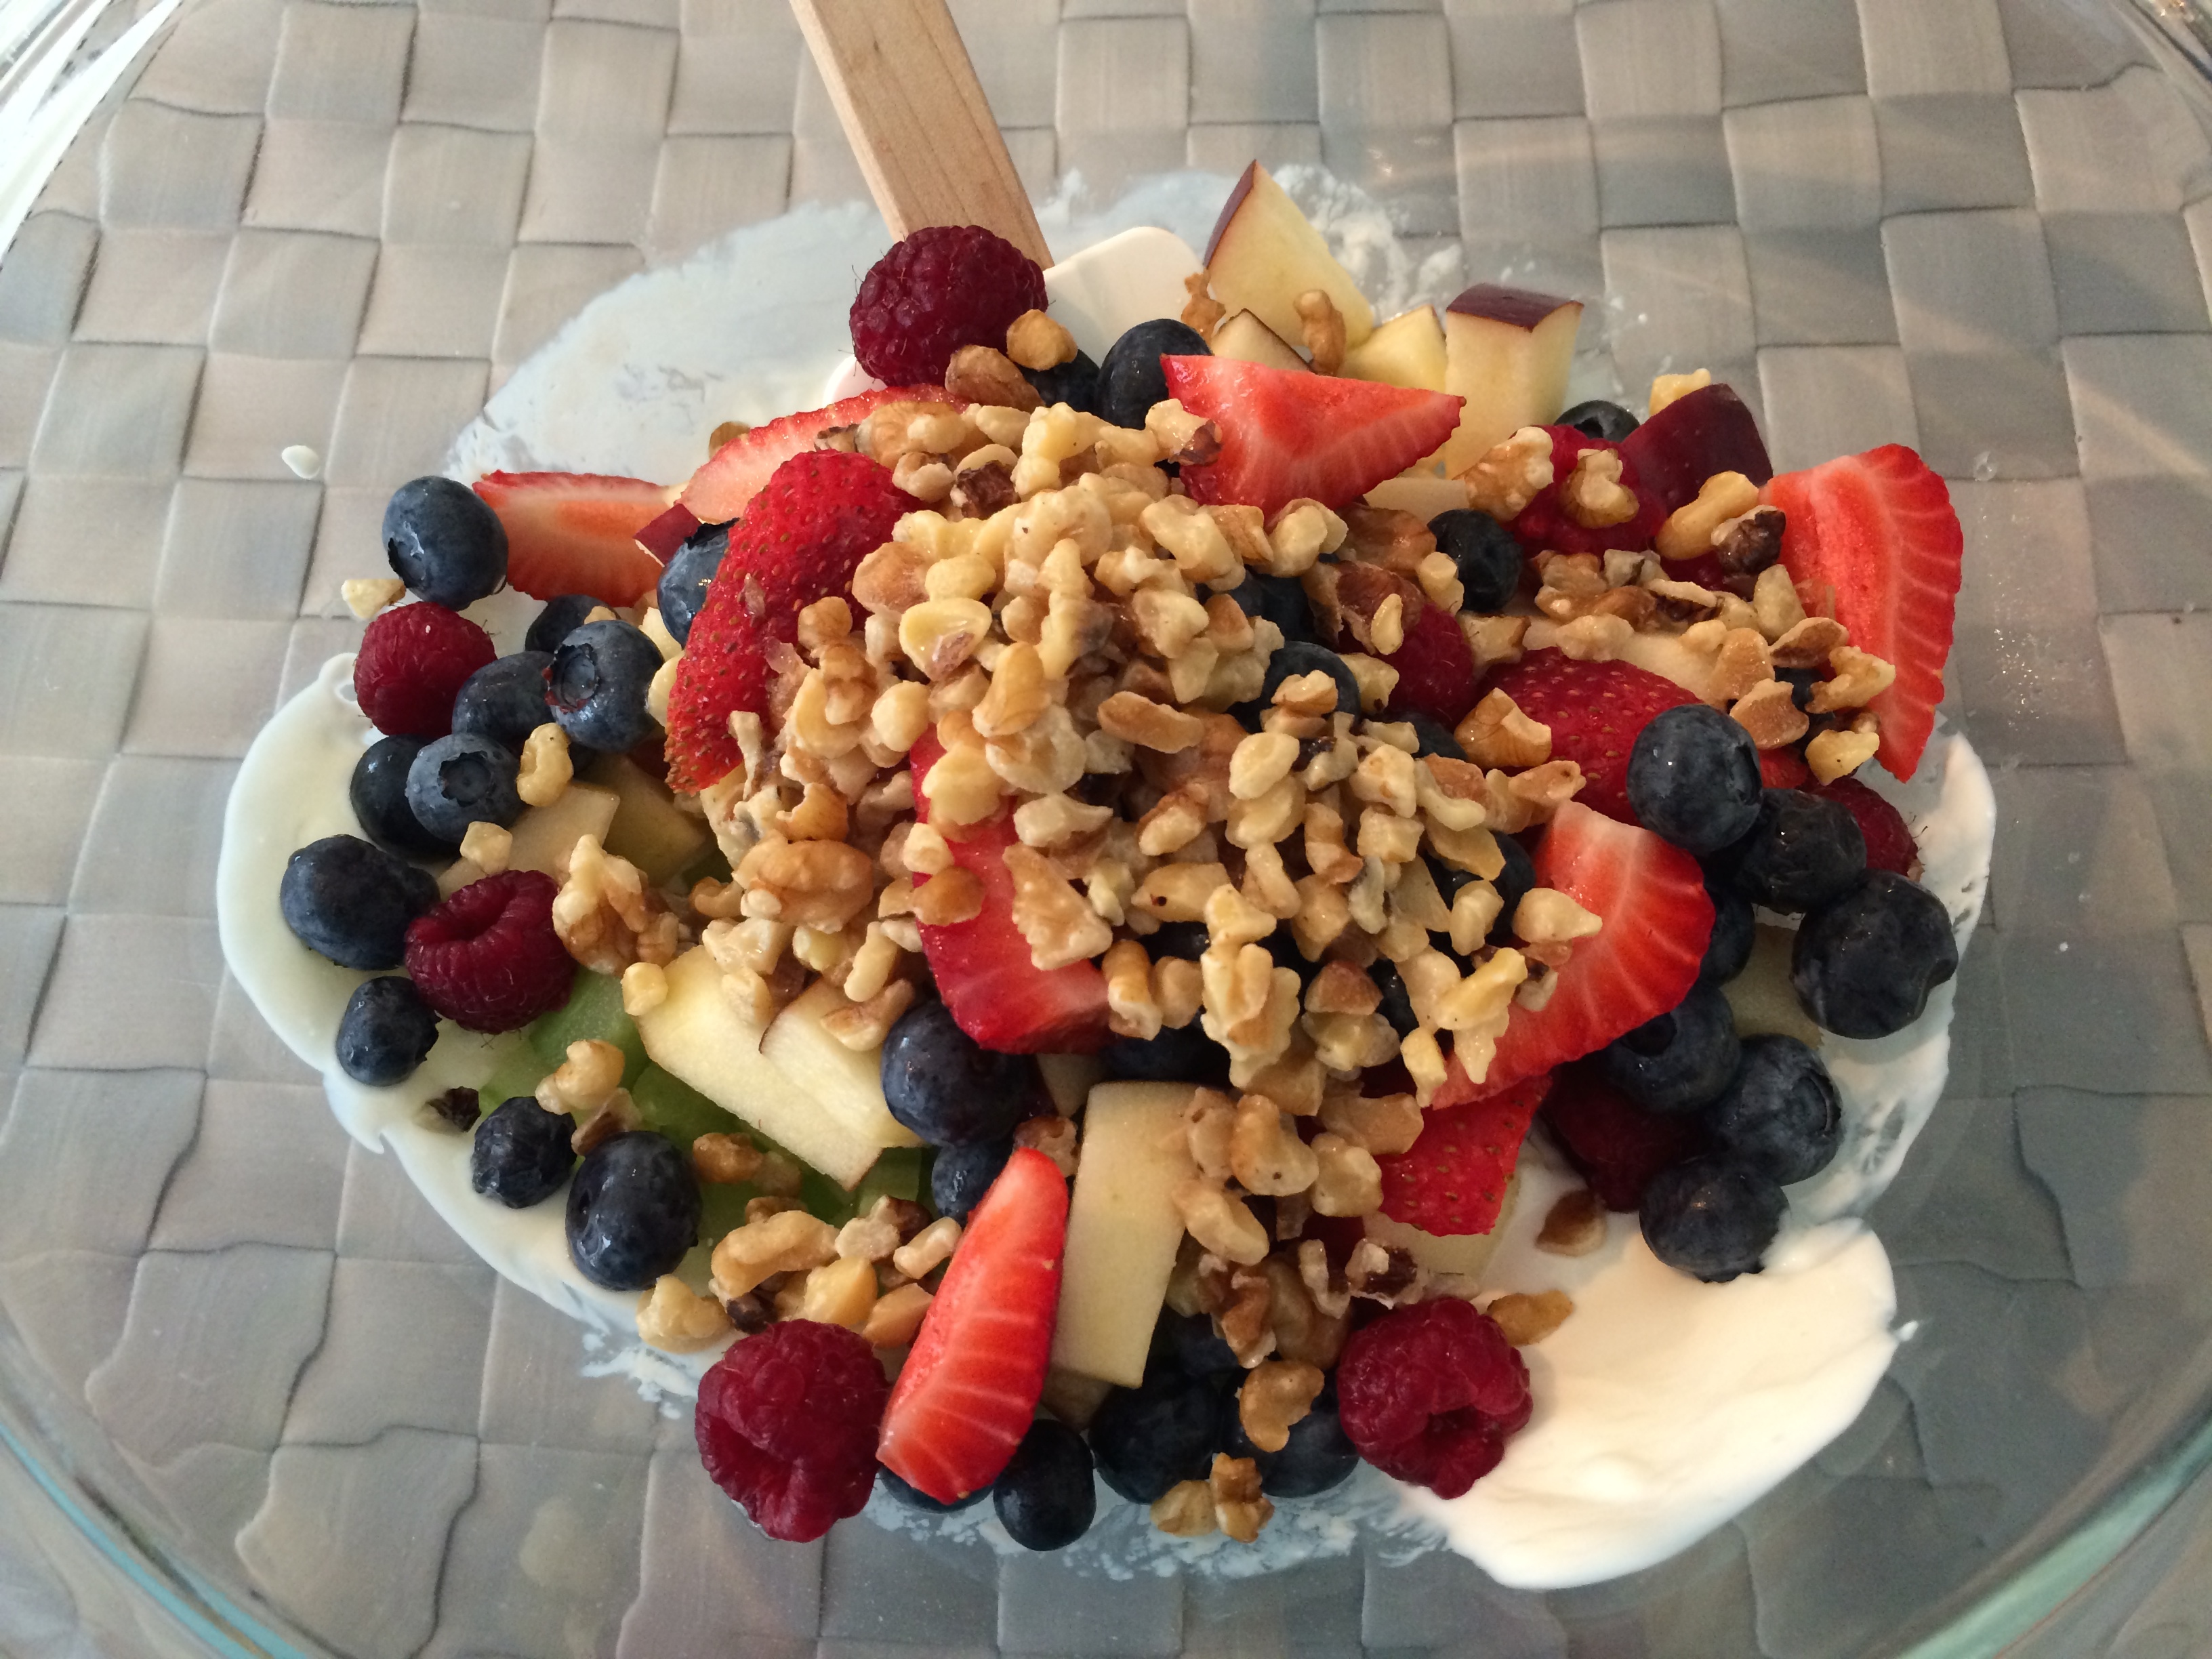
  2. When ready to serve, top each ramekin with graham crumble and strawberries.

Overall, I LOVED the end result and I’ll definitely make it again. Per my notes, next time I would reduce the amount of sugar slightly (there was nothing wrong with the amount of sugar but it was a bit too sweet for me). I would also cut back on the quantity of crumble as I had quite a bit leftover. This makes for a great homemade dessert for a small group and can easily be done with ingredients you have on hand. If you don’t have strawberries at home, you can top the cheesecake with blueberries or any other fruit.

IMG_7221

IMG_7227

IMG_7231

IMG_7235

pic00377

pic01661

pic30160

CONTEST!

You could win a signed copy of Ricardo’s Slow Cooker Favourites cookbook, filled with more than 65 great slow cooker recipes, including vegetarian ones!

Earn entries by doing the following (you can enter using any or all of these methods):

Additional Info:

The contest begins on Thursday October 22, 2015 and will end on Thursday November 5, 2015 at 12 pm EST. The winner will be announced later that day.

You can enter via each method once per day until the end of the contest.

The contest is only open to Canadians with a Canadian shipping address. Ricardo will ship the cookbook directly to the winner’s home.

Good luck!

Mini Apple Cinnamon French Toasts

10 Sep

IMG_0872

Disclosure: I was given samples of Ozery Pita Break’s Just Minis products to try along with some recipe ideas. I only share information about products I enjoy and this is one of them. I hope you’ll try them out too!  

Earlier this year I created a Fattoush Salad recipe using Ozery’s Pita Break’s Large Regular Pita so when they sent me a box with samples of their Just Minis pita products to try out I was excited to try them out.

My baby son is growing up so fast…he’s now a fast moving toddler which means that he can work up quite an appetite. Being a toddler also means that he wants to eat independently, so finding wholesome, great tasting foods that he can enjoy on his own means a lot to me. Bonus points if my husband and I can enjoy them too.  My son is obsessed with bread and one of his favourite ways to eat it is in French Toast. I used Ozery’s Pita Break’s Just Minis Apple Cinnamon flavour and they were delicious. My son was able to hold the mini pita in his little hands and just go for it….it’s always fun to watch him eat : ) He had them plain while my nephews (who are 6 and 13) enjoyed them after school with maple syrup. Overall, they were a hit, which I’ve learned is a big deal when it comes to kids!

Mini Apple Cinnamon French Toasts

Yield: 12 mini French toasts

Ingredients

  • 6 Apple Cinnamon Just Minis, split into halved rounds
  • 3 eggs
  • 1 tbsp milk (Note: I increased the amount of milk to a ½ cup as I wanted the pitas to soak up a lot of the mixture. You may want to use more.)
  • 1 tbsp butter, divided

Optional:

  • 1 tsp brown sugar
  • 1/2 tsp cinnamon
  • 1/4 tsp ground nutmeg
  • Maple syrup

Directions:

In a large shallow dish, lightly beat the eggs and milk together. In a small bowl, combine cinnamon, sugar, and nutmeg (if using). Immerse Apple Cinnamon Just Minis into milk and egg mixture. Turn to coat both sides. (Note: I let the pitas soak in the mixture for about 20 seconds).

Meanwhile, preheat large skillet with lid to medium-high heat, melt 1/2 tbsp butter. Place pita rounds into skillet, cover. Cook for 3 minutes or until golden. Turn, cover and cook 3 more minutes or until golden brown and slightly puffy. Sprinkle lightly with cinnamon & sugar mixture (if using). Top with maple syrup (optional). Serve hot.

Note: I chose not to sprinkle the mini French toasts with the cinnamon/sugar mixture or add maple syrup for my son as I felt the apple cinnamon flavour was sweet enough for him (and for my husband and I). You may want to add the extras for older kids.

My husband and I have been trying to reduce the amount of bread we eat but these are a great solution for when we want to have a little for a snack or meal. What I love about Just Minis is that I can do a lot with them, especially since they freeze beautifully and can be ready quickly if I pop them in the toaster or toaster oven. They make a nice snack with some cheese and cut up carrots and celery for work or after school. We also top them with different spreads – baba ghanouj, peanut butter, jam, cream cheese etc., and we also serve them to our son with scrambled eggs.

IMG_0872

IMG_0887

IMG_0889

To learn more about Ozery’s Pita Break, please visit:

Website: www.pitabreak.com

Facebook: www.facebook.com/ozerybakery.pitabreak

Twitter: @OzeryBakery or www.twitter.com/ozerybakery

CONTEST: Enter to win an Ozery’s Pita Break “Back To School” prize pack!

This prize is valued at over $75 and it includes:

  • A lunch bag
  • Tupperware
  • Reusable snack bags
  • A toaster
  • A few other goodies!

You can earn entries by doing the following:

  • Leave a comment below this blog post and tell me how you would enjoy Ozery Pita Break’s Just Minis. What would you make with them? How would you eat them?
  • Follow both me, Sandy Avvari-Nayani @savvari and Ozery’s Pita Break @OzeryBakery on Twitter. Then, retweet my tweet about this blog post/contest from my Twitter feed at twitter.com/savvari – the tweet will be pinned to the top of my Twitter feed.

Additional Info:

The contest begins on Thursday September 10, 2015 and will end on Thursday September 24, 2015 at 12 pm EST. The winner will be announced later that day.

You can enter via each method once per day until the end of the contest.

The contest is only open to Canadians with a Canadian shipping address. Ozery’s Pita Break will ship the prize package directly to the winner’s home.

Good luck!

Fattoush Salad

16 Mar

IMG_5139

Disclosure: I received a gift card from Ozery’s Pita Break to purchase the ingredients for this recipe.

I’ve been in a salad rut for some time now and it was time to push myself out of the bad habit of making the same salads over and over again. One of the things I enjoy doing the most is trying to replicate my favourite restaurant dishes at home, especially the ones I spend the most money on : )

One salad I adore is a Middle Eastern one called Fattoush (the spelling varies). I often order it when I’m out and I knew that the ingredients were simple enough for me to make the salad at home. I got the little push that I needed to make it when the folks at Ozery’s Pita Break, an awesome company that started right here in Toronto, asked me if I would like to try and make a recipe with their pita products. Ozery’s produces a number of bread products including flatbreads, buns, pitas and crackers that are free of artificial preservatives, colours, flavours and additives. I live in a Jewish neighbourhood, so another point I wanted to share is that all of Ozery’s products are certified as kosher under the Orthodox KSA (Kashruth Supervision of America) organization. In other words, no dairy or animal products or by-products are used, making them great for vegetarians and vegans. Some of my favourite Ozery’s Pita Break products include:


reg-regreg-oww

Apple_Cinnamon_127x226_2


Date_Chia_MorningRounds

oneBun_flaxlavash-fh-pkg


A search online will show that there are many ways to make a Fattoush Salad but I chose to make it the way I enjoy it the most, with basic ingredients and a lovely spice called sumac.

“Sumac is the berry of a shrub that grows in the Mediterranean and parts of the Middle East. It is little known in Western cuisine, but it is an essential ingredient in Arab and especially Lebanese cooking. It has a tart, fruity flavour, and is used to add acidity to food in the same way that lemon is used in Canada and tamarind is used in Asian countries.” (Source: The Silk Road Spice Merchant – http://www.silkroadspices.ca/products/sumac)

The recipe below is my creation and it’s a mashup of several recipes I reviewed online. You can add additional ingredients such as torn romaine lettuce, chopped green, yellow or red pepper, purslane, arugula, radish or use a creamy dressing….as you can see, there are tons of options. If you make your Fattoush Salad a different way, I would love to try it! Please leave a comment below the post or connect with me on Twitter @savvari. Enjoy!

Fattoush Salad

Creator: Sandy Avvari-Nayani – http://www.milkandeggs.ca

Ingredients:

Toasted Pita

2 tablespoons olive oil

One Ozery’s Pita Break Large Regular Pita, split in half to make two separate layers, then tear each layer into bite-sized pieces or cut the pita into 1-inch square pieces.

Dressing

1/4 cup olive oil

1/2 cup freshly squeezed lemon juice

2 teaspoons sumac (found at most Middle Eastern grocery stores)

Salad Ingredients

3 plum tomatoes, deseeded and chopped

2 Lebanese cucumbers, halved lengthways, chopped (or a medium-sized English cucumber, halved lengthways, chopped)

½ a medium-sized red onion, thinly sliced

1 cup flat-leaf parsley leaves, coarsely chopped

1/2 cup mint leaves, coarsely chopped

1 tablespoon sumac

Kosher salt (for seasoning)

Preparation:

Toast the pita: I used my toaster oven to toast the pita pieces. Line your baking tray with parchment paper. Place the pita pieces in a bowl and toss them with the olive oil. Spread the pita pieces onto the parchment-lined baking tray. Toast in the toaster oven until they are crunchy, likely about 3-4 minutes depending on the settings on your toaster. Watch carefully to make sure they brown but do not burn! Once ready, transfer pieces back to the bowl and set aside.

Make the salad dressing: Combine all dressing ingredients in a screw-top jar or other container with a tight fitting lid. Secure lid. Shake until well combined. Set aside.

Salad: Place tomatoes, cucumbers, red onion, parsley and mint leaves in a large serving bowl. Sprinkle with sumac. Drizzle with dressing. Toss gently to combine. Season to taste with kosher salt.

Add toasted pita pieces to the salad. Toss gently and serve. Taste again and add more kosher salt and lemon juice if needed. Serve immediately.

Sandy’s notes: I tried this salad with Ozery’s Organic Whole Wheat Pita as well and it was also delicious. In order to stay “true” to the original recipes for Fattoush Salad however, their plain pita is the best option.

IMG_5117

IMG_5121

IMG_5123

IMG_5133

IMG_5141

To learn more about Ozery’s Pita Break, please visit:

Website: www.pitabreak.com

Facebook: www.facebook.com/ozerybakery.pitabreak

Twitter: @OzeryBakery or www.twitter.com/ozerybakery


CONTEST: Enter to win an Ozery’s Pita Break prize pack!

This prize is valued at over $110 and it includes:

  • A range of Ozery’s Pita Break products
  • Toaster
  • Cutting Board
  • Bowl Dip Set

You can earn entries by doing the following:

  1. Leave a comment below this blog post and tell me what your favourite way to enjoy pita bread is. Do you like to dip it? Stuff it with toppings? Make a pizza? Maybe you’ll teach me something new!
  1. Follow both me Sandy Avvari-Nayani @savvari and Ozery’s Pita Break @OzeryBakery on Twitter. Then, retweet my tweet about this blog post/contest from my Twitter feed at www.twitter.com/savvari

Additional Info:

The contest begins on March 16, 2015 and will end on Tuesday March 31, 2015 at 12 pm EST. The winner will be announced later that day.

You can enter via each method once per day until the end of the contest.

The contest is only open to Canadians with a Canadian shipping address. Ozery’s Pita Break will ship the prize package directly to the winner’s home.

Good luck!

Spaghettini with Roasted Beet and Poppy Seed + a CONTEST!

4 Feb


IMG_4648

Disclosure: Italpasta provided me with a gift card to purchase the ingredients for this recipe.

I love pasta and I could eat it every day of the week if I had to. I’m serious. There are so many pasta shapes and so many ways to eat it that I’m sure I wouldn’t run out of options.

I was excited when Italpasta asked me to try a vegetarian recipe for pasta lovers, perfect for Valentine’s Day, featuring Italpasta Total Pasta Spaghettini. It’s a white pasta with the goodness of 10 grams of fibre packed into each serving, a great option for hubby and I because as much as we enjoy whole wheat and other “healthy” pastas, sometimes we just want (at least what looks like) the regular stuff!

This recipe features butter, spaghettini, beets and goat cheese and they all combine together to form a simple and tasty dish with a beautiful, vibrant beet red finish, perfect for Valentine’s Day or if you’re having guests over and want to impress them. At first I wasn’t sure about adding poppy seeds to the dish but they ended up adding a nice crunch. The texture of the spaghettini was perfect, I never would have known that I was eating a high fibre pasta. We’re adding this dish to our pasta rotation, that’s how much we both liked it! #win

I’ve added some of my own notes in the recipe below. If you make it and have any tips to share, please leave a comment below this post. Happy cooking!

P.S. Don’t forget to scroll down and enter my delicious Valentine’s Day contest to win an Italpasta “For Pasta Lovers” prize pack.

Italpasta’s Spaghettini with Roasted Beet and Poppy Seed

Link: http://www.italpasta.com/recipes-spaghettini-with-roasted-beet.php

Serves 2

Prep Time: 25 minutes

Cook Time: 25 minutes

Total Time: 50 minutes

Ingredients:

½ pound      Italpasta Total Pasta Spaghettini         225 g

2                     small roasted red beets, peeled and cut into wedges (Sandy’s notes: You can save time by roasting the beets a few days before making this recipe).

2 tbsps          unsalted butter            30mL

1 tbsp             Italpasta Extra Virgin Olive Oil 15mL

1                      small shallot, minced  (Sandy’s notes: I used half of a small onion)

1 tbsp             poppy seeds   15mL

2                      sprigs fresh thyme, leaves finely chopped

salt and pepper

¼ cup              crumbled soft ripened goats cheese, for serving      60mL

(Sandy’s notes: I quickly roasted the beets by peeling them and cutting them into cubes. Then I tossed them in a little olive oil, sea salt and pepper and I spread them out on a baking sheet covered with a sheet of parchment paper. I roasted them at 425 F for 30 minutes. You may need longer depending on the size of the beets. While you have your beets in the oven, consider making some roasted potatoes or another dish to save on energy.)

Cook pasta in boiling salted water until al dente or to your taste. Drain and reserve ½ cup pasta water.

In a non-stick skillet over medium heat, brown the butter. Reduce the heat slightly, add extra-virgin olive oil, and stir to combine. Add minced shallot, and cook for 2 minutes, until softened, stir in poppy seeds. Toast the seeds for 1-2 minutes.

To the shallots and poppy seeds, add the chopped beets and thyme, stir for 1-2 minutes. Add ½ cup of pasta water to the skillet. Simmer the sauce over medium heat for 2 minutes. (Sandy’s notes: At this point, I added a ½ teaspoon of chili flakes to add a little spice to the dish).

(Sandy’s notes: This next step is key…stir quickly and constantly to cover all of your pasta with that beautiful red sauce otherwise it will be unevenly coloured.)

Transfer pasta to the skillet and cook for 1 minute until combined, stirring constantly. Taste and adjust salt and pepper seasoning. Serve in warm pasta bowls and top with crumbled goat’s cheese.

IMG_4624

IMG_4629

IMG_4630

IMG_4634

IMG_4637

If you loved the look of this pasta, Italpasta has a second Valentine’s Day inspired pasta recipe – Red Wine Spaghetti: http://www.italpasta.com/recipes-red-wine-spaghetti.php

recipe_redwine

If you’re looking for more ways to impress your loved one on Valentine’s Day, visit Italpasta’s special Pinterest board with tips on how to set the perfect table, host Valentine’s Day on a budget and of course, cook up some awesome pasta recipes here: http://www.pinterest.com/forpastalovers/valentine-s-is-for-pasta-lovers/

Get more tips and recipes from Italpasta here:

Twitter: https://twitter.com/ForPastaLovers

Facebook: https://www.facebook.com/ItalpastaLimited

Instagram: http://www.instagram.com/forpastalovers

Pinterest: http://www.pinterest.com/forpastalovers/

YouTube: https://www.youtube.com/user/ForPastaLovers

CONTEST – Enter to Win a Valentine’s Day Italpasta “For Pasta Lovers” prize pack!

Enter to win a prize pack valued at over $50. It will include:

  • A supply of Italpasta Tradizionale Pasta
  • Apron
  • Cheese Grater

To enter:

1) Follow me on Twitter @savvari or www.twitter.com/savvari

2) Follow Italpasta on Twitter at @forpastalovers or www.twitter.com/forpastalovers

3) Retweet my contest tweet OR tweet this message:

I want to win a #ValentinesDay prize pack from @savvari and Italpasta @forpastalovers http://bit.ly/1vszYbL #forpastalovers

Get a second chance to win by leaving a comment below this post. Tell me what your favourite pasta shape is and what your favourite way to prepare it is – macaroni with cheese? Linguine with alfredo sauce? If you have a great recipe, let me know! If you don’t use Twitter, this would be your method of entry.

You can enter on both Twitter and on the blog post once per day each until the end of the contest. Contest runs until Sunday February 15 at 5 pm EST, so get your entries in!

Additional info:

  • There is one (1) Italpasta prize pack to be won.
  • The winner will be announced by Monday February 15 at 5 pm EST.
  • The contest is open only to residents of Canada.
  • Prize will be shipped directly to the winner. A Canadian shipping address must be provided.
  • Total value of the prize is $50


Persimon Pizza

17 Jan

Please enjoy this guest blog post from Kimberly Toureiro a.k.a @KitchenSprout. Have you ever had persimmons on pizza? After checking out this recipe that’s suitable for vegetarians and non-vegetarians, I think you’ll want to give it a try!

IMG_6726

Behold! The rare jewels of Spain; precious Persimons! From Ribera del Xuquer their harvest commences in the fall, and are available in limited quantities and for a limited time, from October until January only. Persimon branded persimmons, like the tomato, are not properly considered to be “berries”, but in terms of botanical morphology, the fruit is in fact a berry. This fruit is of the “Diospyros” family, which is a genus of 700 species of evergreen trees, shrubs and small bushes. The word “Diospyros” comes from the ancient Greek words “dios” and “pyros” and when translated means “divine fruit” or “divine food” – on first bite I will attest to the accuracy of the description of this obscure gem!

IMG_6449

The characteristics of the “Persimon” from Ribera del Xuquer differ from other persimmon varieties. They are:

1) Bright orange and tend to be larger and longer

2) Are firm and ready to eat (unlike other persimmon varieties, which must be consumed when they are soft)

3) Are not astringent (bitter) thanks to a naturally occurring ripening process

4) Have a sweet, delicate flavour similar to a peach or a mango

Persimon del Xuquer were given the name, Persimon, intentionally spelled with one “m” and were given a registered trademark.  Persimon was also granted a “Denomination of Origin” designation by the Spanish government. This highly coveted quality seal is the only one existing in the world for a persimmon fruit variety and is recognized by the European Union.

I was requested to participate in a Persimon blogger program in late December, whereby I received a case of Persimons from Ribera del Xuquer. In the basket there were five simple and enticing recipes for me to choose from, varying from snacks, mains and dessert. I choose to have a Christmas gathering of six people and I decided to take my guests on a journey to “Espana Autentica” – this provided me with a platform to not only enlighten my guests about this “divine fruit” but to demonstrate the ease of creating any of these seductive dishes. The choice was Persimon and Chorizo Pizza; this particular recipe accommodates both meat eaters as well as vegetarians, as the chorizo can be replaced with soy-based pepperoni. Choosing the pizza ensured crowd involvement, so that each one them could modify their own pizza to their desired tastes. Needless to say everyone loves pizza! It has become an international staple for the young and old, and from culture to culture.

Admittedly the sumptuous persuasion to attempt this dish was predicated on the actual and exotic combination of flavors to be found therein. Trending with “social media” lingo for “foodies” it ranks high on the “foodporn” and “mouthgasm” scale. It possesses spicy, tangy, sweet and savory all in one sensual bite. Leonardo DaVinci was once quoted as saying “simplicity is the ultimate sophistication”. Perhaps he had just indulged upon this very meal! Enough of the foreplay of this gastronomic adventure, let’s get to the ingredients and steps of creating this alluring pizza.

Ingredients:

500g        pizza dough

2              Persimons, thinly sliced crosswise

2 tbsp      lemon juice

1 cup       thinly sliced spicy chorizo or soy-based pepperoni

1/2 cup    shaved Manchego cheese

2 tsp        balsamic glaze

2 cups     baby arugula

1 tsp        olive oil

pinch of salt and pepper

Preparation:

Preheat oven to 425F

On a lightly oiled work surface divide dough in half.  Roll and stretch to form either rectangles or circles. Transfer to parchment lined baking sheets.

Toss Persimon slices with lemon juice and arrange on dough, top with chorizo or soy-based pepperoni slices.

Bake in preheated oven for 10-15 minutes until crust is golden brown.

Remove from oven, sprinkle with shaved cheese and drizzle with balsamic glaze.

Toss arugula with oil, salt and pepper and scatter on pizzas just before serving.

Serves 4

PER SERVING (1/4 recipe or 1/2 pizza)

573 calories, 23g fat, 9g saturated fat, 46mg cholesterol, 1053mg sodium, 76g carbohydrates, 3g fibre, 12g sugars, 21g protein, %RDI: 20% calcium, 45% iron, 4% vitamin A, 60% vitamin C

IMG_6710

IMG_6717

IMG_6718

IMG_6726

IMG_6727

In closing, I am honored to have been selected to participate in the Persimon blogger program; not only was it the perfect kick-start to the Christmas season, but made for a very informative and taste perceptive venture.  My guests and myself, admittedly rookies, indulged in our first time making homemade pizza…scratch that one off the bucket list. The peppery arugula, once blended with the sweet Persimon, was a symphony for the taste buds, and then the music continued to play in the form of the tart balsamic, delicate cheese and spicy chorizo and soy-based pepperoni. Being a culinary writer, I am often approached as to where certain items are best prepared. Coincidentally last Saturday, I was asked which were my top 3 pizzas for 2014.  Without reflection I immediately articulated “my house!” – the “divine fruit” Persimon, with its sweet suasion invigorated in all of us the joyful art of pizza making.

Be sure to visit the Persimon website to enter to win a trip to Spain! Click here for more info – http://persimonsays.com/contest/

Links: 

Website: http://www.persimonsays.com

Twitter: @persimonsays

Hashtag: #persimonsays

IMG_6728

About Kimberly Toureiro @KitchenSprout

Guest blogger Kimberly Toureiro is an accomplished and accredited food writer and food enthusiast, published locally and internationally, who is passionate about all things culinary and wine related.

Raised in Newmarket, Ontario, Kimberly – better known as the Kitchen Sprout – has lived most of her life in the bustling and multi-cultural city of Toronto, having broadened her taste buds with international fare from an early age. Never having met a meal she didn’t appreciate or a bottle of wine she didn’t enjoy, Kimberly continues to explore the ever-changing world of food trends.

When not attending menu tastings or food-related events, Kimberly can be found at a local farmer’s market, selecting fresh ingredients for her next great at-home meal.

Margherita Penne

27 Nov

IMG_3778

I love the Milk Calendar. I’ve been kind of obsessed with it since I was younger and I would read all of the recipes over and over again and ask my mom which ones we could try. Since we were vegetarian, there were only a few recipes we could try, so it was pretty easy to pick them out!

I was excited to get a copy of the 2015 Milk Calendar this year, even more so because I once again had the opportunity to try one of the recipes, with ingredients generously provided by the Dairy Farmers of Canada. The test recipe this time was Margherita Penne and I knew I would enjoy this dish as soon as I saw the ingredients list. Tomatoes, bocconcini, basil…..yum!

Margherita Penne

Link to the original recipe from the 2015 Milk Calendar recipe site (please note that I have not changed the original recipe, I’ve just included my own notes below) – http://www.dairygoodness.ca/recipes/margherita-penne

Course – Main Dishes

Prep. Time – 10 mins

Cooking Time – 13 mins

Yields – 4 to 6 Servings

This yummy pasta is based on the classic pizza margherita, which is topped with tomato sauce, cheese and fresh basil – sometimes the simplest things taste the best.

Sandy’s notes:

-The recipe calls for 1 1/2 tsp of dried thyme but I’m not a huge fan of thyme in pasta dishes so I only added a 1/2 tsp. It was more than enough to flavor the dish nicely in my opinion. I think 1 tsp of dried oregano would be a great substitute as well.

-If you want to be able to see the bocconcini in the dish then add it in seconds before serving it, otherwise it will melt into the pasta.

-While I enjoyed this pasta hot, I enjoyed it even more after I reheated it the next day. I just needed to add a few tablespoons of water to get the sauce going again.

-See additional tips from the Dairy Farmers of Canada below the recipe.

Ingredients:

12       oz  (375 g) penne pasta

2          tbsp  (30 mL) butter

4          cloves garlic, minced

1 1/2  tsp       (7 mL) dried thyme

1/2     tsp       (2 mL) salt

1/4     tsp       (1 mL) hot pepper flakes

2          tbsp    (30 mL) all-purpose flour

2 1/2  cups    (625 mL) Milk

2          cups    (500 mL) cherry tomatoes, cut in half

1/2     cup      (125 mL) grated Canadian Parmesan

12       1-inch (2.5 cm) mini Canadian Bocconcini

1/2     cup      (125 mL) fresh basil leaves, thinly sliced

Canadian Parmesan, for serving

Preparation:

In a large pot of boiling salted water, cook pasta for about 11 min or until al dente, or according to package directions.

Meanwhile, in a large pot, melt butter over medium heat. Add garlic, thyme, salt and hot pepper flakes. Cook 1 min. Sprinkle with flour; cook, whisking for 1 min. Gradually whisk in milk. Bring to a boil and reduce heat. Whisk for 3 to 5 min or until smooth and thickened. Stir in tomatoes and Parmesan.

Drain pasta and return to pot. Pour in sauce; toss, stirring 1 to 2 min over medium heat to coat pasta. Stir in Bocconcini, basil and salt to taste, if needed. Serve with grated Parmesan.

IMG_3762

IMG_3764

IMG_3765

IMG_3766

IMG_3771

IMG_3773

IMG_3774

IMG_3778

Tips from the Dairy Farmers of Canada:

-Bocconcini come in different sizes, so if you need to cut the balls, the pieces should be about ¾-inch (2 cm) in size.

-Try cubes of Mozzarella instead of Bocconcini.

-Add some of your favourite pizza toppings to the sauce, such as pepperoni, olives or sun-dried tomatoes. Or use your favourite short pasta in place of penne.

To check out the rest of the recipes from the 2015 Milk Calendar, please visit – http://www.dairygoodness.ca/milk/my-milk-calendar/recipes/year/2015


“Waldorf” Berry Salad

11 Aug

Waldorf Berry Salad final

Disclosure: Dairy Farmers of Canada provided me with a basket of fresh ingredients so that I could try this recipe. I did not receive any compensation for writing this post.

I haven’t posted to Milk & Eggs in a long time and there’s a very good reason for it, I had a baby (my first) in May and time has just flown by! As a new mom, I’m on the hunt for quick and tasty vegetarian recipes – bonus points if I can make it and store it in the fridge to have it the following day or days later. So I was quite excited to be asked by Dairy Farmers of Canada to try a recipe which would combine fresh local berries and real cream made from 100% Canadian milk. Dairy Farmers of Canada joined forces with chefs from across Canada to create new recipes that combine berries and cream, seriously one of life’s greatest combinations.

The recipe I chose was Chef Michael Allemeier’s “Waldorf” Berry Salad, as the combination of berries and the crunch of celery and walnuts sounded unusual and very interesting. The recipes from all of the chefs are featured on www.AnyDayMagic.ca – I can’t wait to try more of them before berry season is over for another year…

“Waldorf” Berry Salad

An exciting twist on a classic summer salad. Celery, toasted walnuts, apples, mixed berries, all tossed in a creamy dressing – using half and half cream, sour cream and Greek yogurt.

Ingredients

1/4 cup (60 mL) 10% half-and-half cream

3 tbsp (45 mL) sour cream

3 tbsp (45 mL) Greek yogurt

1 tbsp (15 mL) fresh lemon juice

1 1/2 cups (375 mL) diced celery

1 cup (250 mL) toasted walnuts, lightly crushed, divided

1 red delicious apple, cored, quartered and diced (skin on)

1 2/3 cups (375 mL) assorted berries, (such as blueberries, blackberries, raspberries, or quartered strawberries, if large)

Salt

Black pepper

8 – 10 whole butter lettuce leaves

10 – 12 celery leaves

Preparation

In a large bowl, stir together cream, sour cream, yogurt, and lemon juice. Stir in celery, ¾ cup (175 mL) of the walnuts and apples. Gently fold in berries. Season to taste with salt and pepper.

In a bowl or on a serving platter, arrange lettuce leaves and gently spoon salad on top. Garnish with remaining walnuts and celery leaves.

Tips

For tender and sweeter celery, peel the back part of the celery rib with a vegetable peeler; this really changes the flavour and nature of celery!

Celery leaves can be found in the heart of the celery.

My notes

I made this salad twice, the first time with the celery, celery leaves and walnuts and the second time without these ingredients. I enjoyed the salad more without the above ingredients in it as I wasn’t fan of the textures they added. That said, removing these items really just makes this a creamy fruit salad but you know what, there’s nothing wrong with that at all! It was refreshing and a great way to get good dose of dairy, antioxidants and fibre, all in one dish!

Let me know if you end up trying the recipe and if you have any tips to share!

photo-7

photo-10

photo-9

photo-4

photo-3

photo-5

Waldorf Berry Salad final

Baked Egg Cups and a contest from Egg Farmers of Canada!

14 May

Early mornings, busy days and late nights leave only a short amount of time for many couples and families to make dinner. An easy solution… “get cracking” and make breakfast for dinner! I’m a big supporter of Canadian farmers, so I was excited to receive an invitation from the Egg Farmers of  Canada to test their Baked Egg Cups recipe. With the summer coming up, I’m looking forward to pairing fresh Canadian eggs with produce from my local farmers’ markets.

The Egg Farmers of Canada conducted a survey in April 2013 with over 3,000 Canadians, aged 18 and over. In the study, they found that distance from farm to grocery store is seen as the key to freshness. Eighty per cent of Canadians surveyed are confident products from within Canada are at peak quality when purchased. Conversely, 53 per cent believe imported foods cannot be considered fresh. “In an age where grocery aisles are filled with foods from around the world, it is clear that Canadians place the highest value on locally produced food, exactly what the system of supply management allows for,” says Bonnie Cohen, Manager of Marketing and Nutrition for Egg Farmers of Canada. “The results are identical regardless of socio-economic status, telling us that all households want the food they feed their families produced by local farmers.”

Be sure to visit the Egg Farmers of Canada Facebook page by May 15 for a coupon to save $1.00 off the purchase of 2 dozen eggs! You’ll need them to make the Baked Egg Cups, so why not save a little : ) I’m happy to share that they were really easy to make, as I had everything prepped and ready in 10 minutes, which gave my oven enough time to preheat. I popped them in and less than 20 minutes later, they were ready to go. I’ve included a lacto-ovo vegetarian version of the recipe below. Enjoy!

Baked Egg Cups (Lacto-Ovo Vegetarian version)

Baked Egg Cups (Lacto-ovo vegetarian version)

The original recipe can be found at: http://eggs.ca/cooking-with-eggs/recipe/baked-egg-cups/ and you can see the video at the top of this post.

Ingredients

Baby spinach leaves (approximately 1 cup)

6 tsp (30 mL) crumbled goat cheese

6 eggs

6 tsp (30 mL) milk

2 tsp (10 mL) finely chopped chives or dried herbs

1/8 tsp (0.5 mL) black pepper

Directions:

Preheat oven to 350°F (180°C).

Spray bottoms and sides of 6-cup muffin tin with cooking spray. Line inside of each muffin cup with baby spinach leaves (about 8-12 leaves, stems removed). Then sprinkle 1 tsp (5 mL) of crumbled goat cheese over spinach. Carefully crack an egg over top. Spoon 1 tsp (5 mL) milk over each yolk. Sprinkle chives or dried herbs and black pepper over top.

Bake in preheated 350°F (180°C) oven until whites are set and yolks are cooked as desired, 18 to 20 minutes. Run knife around inside of each muffin cup, then remove and serve.

Variations: 

  • Instead of a muffin tin, use six 1/2-cup (125 mL) ramekins or custard cups.
  • Instead of spinach, use a large kale leaf to line the cups.
  • Instead of spinach, using a rolling pin to flatten a piece of bread and arrange in the muffin tin to form a cup. If you would still like to use spinach, line your bread cup with it before adding the other ingredients.
  • Instead of goat cheese, use feta cheese, cream cheese or a grated hard cheese of your choice.
  • Omit goat cheese and milk; sprinkle grated Parmesan or Cheddar cheese over each egg before baking.
  • Over spinach leaves, place a thin slice of tomato and a slice of large white or cremini mushroom.

Sandy’s notes:

I chose to make two of the Baked Egg Cups with flattened pieces of bread (I used up the end pieces) and the other two with baby spinach leaves. I enjoyed both versions, however the spinach version was lighter and more impressive to look at. Overall, the Baked Egg Cups were easy to make, tasty and left me feeling full and satisfied. For a group gathering, I would serve them with a soup, a salad and a fruit tray for a quick and easy brunch, lunch or dinner.

For more information on what you can do with eggs, visit http://www.eggs.ca for recipes, tips, and more!

Egg Farmers of Canada prize pack

Egg Farmers of Canada prize pack

CONTEST: I’m giving away an Egg Farmers of Canada prize pack including a muffin tin, a “Get Cracking” apron, microwave egg cookers perfects for couples and moms-on-the-go, a magnetized grocery list, the Farmers’ Favourite recipe booklet, and a $20 grocery store gift card to buy the fresh ingredients you need to make these tasty Baked Egg Cups. Please note that you must be a resident of Canada to win, it is an Egg Farmers of Canada contest after all!

TO ENTER:

Visit the Egg Farmers of Canada site and check out their amazing list of recipes here: http://eggs.ca/cooking-with-eggs/all-recipes , then leave a comment on this blog post to share which recipe you would make on a busy weekday night.  P.S. Don’t forget to include your Twitter, Facebook or blog site address so I know how to reach you! It’s that easy! You can enter once per day.

Again, you must be a resident of Canada to enter!

Hurry, contest closes on Saturday May 18 at 12 pm EST. Good luck!

And the winner is….Zach Bussey @zachbussey ! Thanks everyone for playing : ) 


Disclaimer: I received a basket from the Egg Farmers of Canada with everything I needed to make these Baked Egg Cups.

Whole Lemon Bars and enter to WIN a copy of The Smitten Kitchen Cookbook!

21 Apr

Whole Lemon Bars 12

I love lemons. I love how they look and I love how I feel when I smell or taste a fresh lemon. I love the song by U2. Oh and I also love Eduoard Manet’s painting, Le Citron.

Life has handed me a lot of lemons lately, both the delicious, yellow kind and those not so good lemons that disrupt your life. As they say though, it’s all about what you do with those lemons and on a recent weekend I decided to put some of my lovely lemons to good use. I cracked open one of my newest cookbooks, The Smitten Kitchen cookbook, written by one of my favourite food bloggers, Deb Perelman.

I’ve been following her fabulous blog, The Smitten Kitchen, for some time now and I’ve made quite a few of her recipes over the years. What I love about her recipes is that they are perfect for the average home cook. It’s not just about the recipes though, it’s her writing that keeps me coming back over and over again. So when I received an invitation from Random House Canada to attend a blogger brunch in celebration of the launch of The Smitten Kitchen Cookbook, I accepted it immediately. As expected, Deb was warm, friendly and willing to share her stories with the bloggers in attendance. We were all hanging on to every word, as she described her kitchen and what it was like to write, test and photograph all of her recipes. She is one of the inspirations behind my blog and I’m sure she has given countless others the push they needed too.

After munching on delicious treats cooked up by the amazing Random House staff, we had some one-on-one time with Deb. I was telling her how obsessed my family was with all things lemon and she immediately grabbed her cookbook, flipped to the Whole Lemon Bars recipe and said, “You HAVE to try this, they are so delicious.” Of course, she was absolutely right! This is now my favourite lemon bar recipe as it has the perfect balance sweetness and tartness. I love that I get to use a whole lemon, skin and all (minus the seeds of course!).

Are you a fan of The Smitten Kitchen blog? Well, I’m happy to share that I have one copy of the The Smitten Kitchen Cookbook to give away! Scroll down below the Whole Lemon Bars recipe for details on how to enter. By the way, you HAVE to make these lemon bars. Like right now. Go.

Deb Perelman’s Whole Lemon Bars

Recipe reprinted with permission from The Smitten Kitchen cookbook by Deb Perelman. Copyright 2012 by Knopf, a division of Random House, Inc.

Ingredients:

For the crust:

1 cup/125 g all purpose flour

1/3 cup/65 g sugar

1/4 teaspoon salt

8 tablespoons/115 g or 1 stick unsalted butter, cut into chunks, plus extra for greasing pan

For the filling:

1 small-to-medium lemon (about 4 1/2 ounces or 130 g, or about 3 inches long)

1 1/3 cup/265 g sugar

8 tablespoons/115 g or 1 stick unsalted butter, cut into chunks

4 large eggs

2 tablespoons cornstarch

1/4 teaspoon kosher salt

Directions:

1. Place a rack in middle of the oven and preheat your oven to 350 degrees F. Cut two 12- inch lengths of parchment paper, and trim each to fit the bottom of an 8- inch square baking pan. Press the first sheet into the bottom and up the sides of your pan in one direction, then use the second sheet to line the rest of the pan, running it perpendicular to the first sheet. Lightly butter exposed parts of parchment or coat them with a nonstick cooking spray. Set the pan aside.

Whole Lemon Bars 1

Whole Lemon Bars 2

Whole Lemon Bars 3

2. Make the crust: Blend the flour, sugar, and salt together in the work bowl of a food processor. Add the butter and pulse until the mixture is powdery, but if firmly pinched, will hold the pinched shape. Turn the dough crumbs into the prepared baking pan and press the dough evenly across the bottom and about ½ inch up the sides. Prick the dough all over with a fork and bake for 20 minutes, or until lightly browned. Should any parts bubble up, gently prick them again with a fork. Leave the oven on.

Whole Lemon Bars 4

3. Make your filling: Cut your lemon in half, and here’s where I need us all to be, briefly, quite fussy.

Is the white part of the skin especially thick?

If the widest part of the white is ¼ inch thick or less, continue on to the next step; your lemon is good to go. If any part of it is thicker than ¼ inch, however, I find it safest to remove the skin from half the lemon or the bitterness of the pith can overwhelm the bars. To remove the skin, place half the lemon cut-side-down on the cutting board, and remove the skin and pith from the entire half in downward cuts and discard it. The second half, even if just as thick, can be used as is.

Whole Lemon Bars 5

Whole Lemon Bars 6

Whole Lemon Bars 7

4. Cut your lemon halves into thin rings and discard any seeds. Toss the lemon rounds – lemon flesh and peel – in the bowl of your food processor, add the sugar, and run the machine until the lemon is thoroughly puréed, about 2 minutes. Add the butter and again run the machine until the mixture is smooth, scraping down the sides of the work bowl as needed. Add the eggs, cornstarch, and salt and pulse the machine in short bursts until the mixture is evenly combined.

Whole Lemon Bars 8

Whole Lemon Bars 9

5. Pour the lemon mixture over the crust and bake it for 35 to 40 minutes, or until the filling is set. You can test this by bumping the pan a little; it should only jiggle slightly. In my oven, I find that the point at which the filling is set is also when the lemon bars start to get very light brown on top.

6. Let the pan cool completely on rack or in the fridge. Gently cut around the outside of the parchment paper to make sure no sides have stuck, then gently use the parchment “sling” to transfer bars from pan to cutting board. Cut into 16 squares.

Whole Lemon Bars 10

Whole Lemon Bars 11

Sandy’s notes: I dusted them with icing sugar, to make them look fancier. I wish I had better photos of the lemon bars but my family ate them all up so quickly! I thought these were THE best lemon bars I’ve ever had. The balance of lemony goodness, salt and sugar was perfect. I wouldn’t change a thing about this recipe. Enjoy!

Whole Lemon Bars 12

CONTEST: Win a copy of The Smitten Kitchen Cookbook by Deb Perelman

I’m giving away a copy of The Smitten Kitchen Cookbook by Deb Perelman! You must be a resident of Canada to win. If you win, the cookbook will be shipped directly to your home.

TO ENTER:

Option 1: Leave a comment on this blog post and tell me what your favourite recipe is from the Smitten Kitchen blog (http://smittenkitchen.com/) P.S. Don’t forget to include your Twitter, Facebook or blog site address so I know how to reach you!

OR

Option 2: Follow me on Twitter @savvari and tweet the following:

I want to win a copy of The Smitten Kitchen Cookbook from @savvari #cookbook #contest

You can enter once a day using each option! Canadian residents only.

Hurry! Contest closes on Tuesday April 30 at 5 pm EST. Good luck!

And the winner is…. Leora Heilbronn @leoraheilbronn – congrats!!


Smitten Kitchen

Zucchini Soup and enter to win Shirley Plant’s cookbook Finally…Food I Can Eat!

25 Feb

Shirley Plant's Finally...Food I Can Eat!

Fifteen years ago, author Shirley Plant found that she had to make changes to her diet after being diagnosed with Chronic Fatigue Syndrome, Fibromyalgia and multiple food and environmental allergies. She understands firsthand the difficulties of trying to plan creative, nutritious, and affordable menus while having to avoid such common foods as wheat, dairy, eggs, corn, gluten, and sugar, just to name a few. Through understanding, education, and a keen interest to help people find food alternatives to fit into their life schedules, she has developed an expertise and reputation in dietary design and customized recipes, as well as being a personal chef for clients with dietary sensitivities. Her recipe book, Finally…Food I Can Eat! provides those with multiple food allergies and sensitivities with a ton of great recipes. She’s also included advice on food combining, rotation diets, substitutions and more.

I’ve been experimenting with my diet since last year, to find out what I am sensitive to. Although my symptoms cannot be compared with those who have severe allergies, I know how difficult it was to enjoy food when I was constantly analyzing every ingredient. It was exhausting to figure out what I could and couldn’t eat and I certainly made mistakes along the way, as “forbidden” ingredients are everywhere.

Shirley’s book simplifies things by providing recipes that cover off most of the major allergies and intolerances, but the key is, the recipes actually sound tasty! There are so many recipes and options in this cookbook that the possibilities really are endless. What made me most proud was to find out that she’s Canadian!  Many thanks to Vicky @momwhoruns for connecting us : )

I had some zucchini in the house, so I immediately thought of Shirley’s recipe for Zucchini Soup. It was simple, satisfying and allowed the ingredients to shine. Don’t forget to scroll down after you check out the recipe, I’m giving away a copy of Finally…Food I Can Eat! You can purchase her book from Chapters/Indigo online here: http://bit.ly/13hGn9L

Zucchini Soup from Shirley Plant’s cookbook Finally…Food I Can Eat!

Zucchini Soup

Taken from Pg 112 of Finally…Food I Can Eat! by Shirley Plant

Note: This recipe is free of dairy products, wheat, yeast, corn, sugar, eggs, soy, nuts, nightshades, and gluten.

Ingredients:

Olive oil

6 cups zucchini, diced (approx. 3 large zucchini) (1.5 L)

1 medium onion, diced

2 cloves garlic, minced

3-4 cups water or vegetable soup stock (750 ml-1 L)

1 tsp basil (5 mL)

1 tsp oregano (5 mL)

1 tsp sea salt (5 mL)

½ tsp pepper

1 can beans – navy, lima, or northern beans (14 fl oz. -398 ml) (Sandy’s notes: I drained, rinsed and drained the beans again).

Handful parsley or watercress to garnish (optional)

Directions:

Cut zucchini info small chunks. In a soup pot, heat oil and add onions and cook until soft, approximately 2 minutes. Add soup stock or water, basil, oregano, salt, pepper, and simmer for 15 minutes until zucchini is soft.

Add canned beans and parsley and purée with hand-held blender.

You can serve this soup hot or cold.

Yields: 8 cups (2 L).

Sandy’s Notes:

  • I added 1/2 a teaspoon of chili flakes for a bit of a kick
  • I had a ¼ cup of canned corn on hand, so I added it to the soup for colour (Note: the original recipe is corn free, but (thankfully) I’m not allergic to corn!)
  • Before pureeing the soup, I removed 1 cup of the vegetables and set them aside. My hand blender wasn’t working very well, so I put the soup in the blender in small batches to puree it. I then stirred in the vegetables I had set aside, to add some texture to the soup.
  • I found that my soup was a bit thick, so I thinned it out with some water

CONTEST: Win a copy of Shirley Plant’s cookbook “Finally…Food I Can Eat!”

I’m giving away a copy of “Finally…Food I Can Eat!” by Shirley Plant! You must be a resident of Canada to win. If you win, the cookbook will be shipped directly to your home.

TO ENTER:

Option 1: Leave a comment on this blog post and tell me why you should win a copy of “Finally…Food I Can Eat!” P.S. Don’t forget to include your Twitter, Facebook or blog site address so I know how to reach you!

Option 2: Follow me on Twitter @savvari and tweet the following:

I want to win a copy of @sherrecipes cookbook “Finally…Food I Can Eat!” from @savvari #cookbook #contest

You can enter once a day using each option!

Hurry! Contest closes on Sunday March 3 at 5 pm EST. Good luck!